7

Friday, April 27, 2007

XJ6 Series III Pedalbox and Master Cylinder

One of the initial goals for this project was to upgrade to dual circuit brake system. I have had two experiences with total loss of brakes on one circuit cars so I am not willing to take any risks. Especially as this will be my daily driver.

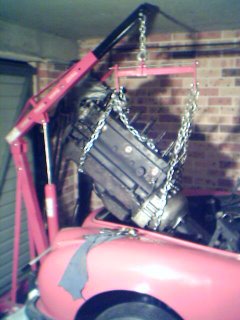
I decided to go with a XJ6 Series III pedalbox with the master cylinder and brake booster in order to stick to the Jaguar components as far as possible and also since the design is perfect for this application. I don't know if it would be possible to do this conversion on a carburated car as the brake booster might not fit behind the carbs. In my case I have fitted a Series III EFI engine where the intake manifold tapers downwards leaving enough room for the booster. It will still be a tight fit for the air intake to the throttle body so I might have to move it forward later on if it has problem breathing. On a Left Hand Drive car I assume you would have plenty of room.

To fit the XJ6 pedalbox I had to cut out a bit of the firewall around the mounting holes for the original pedalbox.

This is what it looked like originally :

And this is after some cutting


The flap at the back is a piece which I cut out partially and then folded up to weld at the top to reinforce the area.

When I bought my XJ6 pedalbox from the wreckers I also bought a cut out of the firewall from the XJ6. This cutout will sit between the original brackets for the battery shelf. You can see on the left in the above picture that I had to narrow this bracket to make the new pedalbox fit. Obviously the battery won't fit here anymore so it will go in the boot/trunk.


This is what it looks like with the cut-out welded on top of the battery shelf brackets and a thick sheet metal cut and bent into shape to support it


Excuse me for the horribly looking spot welds. I had run out of gas in my disposable MIG bottle due to a leaking seal.

The three innermost bolts won't be accessible to screw in from below anymore so instead I welded three nuts underneath the cut out and will bolt the pedalbox from above instead.

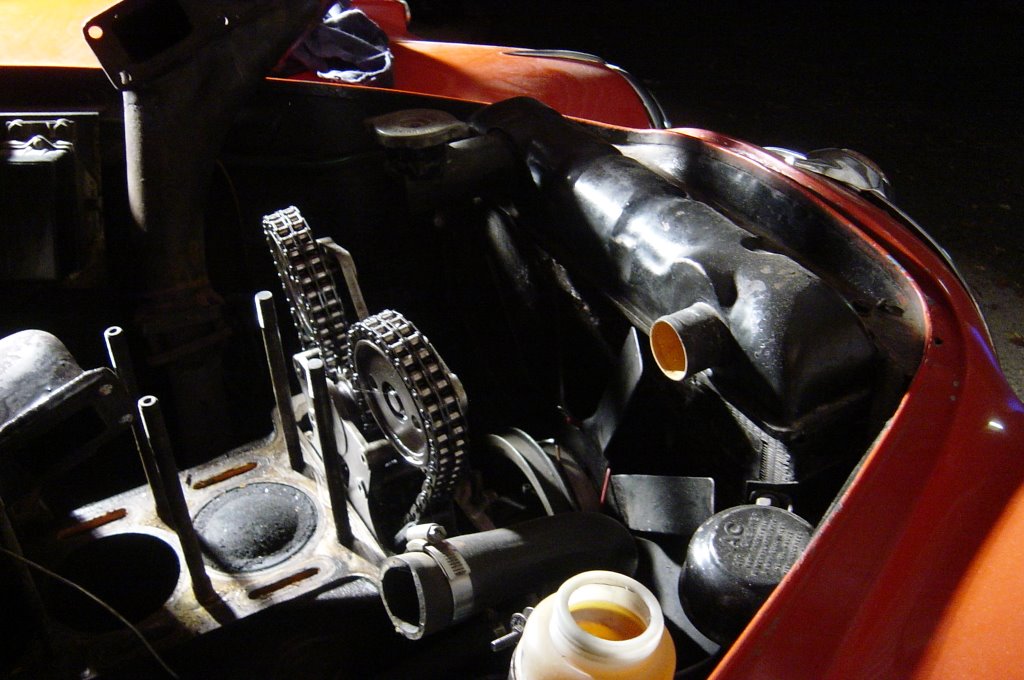
I also had to move the spring for the bonnet latch as the brake booster was in the way.

The only problem now is that the brake pedal is a bit too far from the accelerator due to the pedal arm being offset to the left. I have been told that the pedal arm from a manual is straight but haven't been able to source one yet. One wrecker laughed at me when I asked if they had any so it might be a long search. If anyone out there has one for sale then please leave a comment to this post.

In the next post I will show how I built a bracket for the alternator

Labels:

Saturday, April 14, 2007

Delays

I haven't had time to work on the Jag for a while now. First I resprayed my Mercedes 450SL into the signalred. It looks so much better now than the partly faded yellow.


Secondly and more importantly my wonderful daughter Agneta was born on the 15/12:

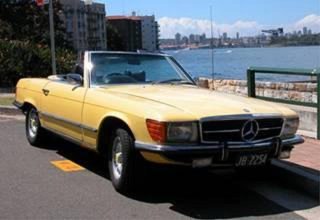
As there is no room for her in the back of the Merc it is now for sale.

I have had some time to work on the Jag recently though. I have fitted the XJ6 Series III brake master cylinder and pedal box to the firewall. I will upload some pictures in my next post. I am facing a problem that there was not enough room in the engine bay to move the pedal box far enough to the right to align the brake pedal with the accelerator. This is caused by the bend to the left in the pedal arm. I am hoping that the pedal arms on the manual cars are straight and that I can source one. Otherwise I will have to heat and straighten the existing arm.

Labels: ,

Tuesday, October 31, 2006

Squeezing the new engine in

I have read about other people putting a XJ6 Series III engine in MK2s so I thought it would be a breeze. So I got a nasty surprise when I noticed that the inlet manifold fouled the steering column. Obviously the other success stories I have read about were LHD cars so the steering column wouldn't have caused a problem. First I thought that I would lean the engine or flatten the bottom of the Manifold through cutting and welding it. Then I found out about Andrew's engine conversion where he bought an engine with a manifold mounted upside down (http://www.jaguarhunter.org.au/Technical_Pages/MK2_EFI.htm)
This sounded like a great solution but after consulting with Andrew who has been really helpful, and also trying to mount it upside down, I realised that it would be too much work modifying the water ways and also it wouldn't leave me much room to fit an integrated Brake booster and master cylinder.
Trial and error resulted in the decision to put a 2 cm spacer underneath the right engine mount which will tilt the engine enough to clear both the steering column and the fender walls.
I just ordered my Series III Master Cylinder, booster and pedalbox from a wrecker yesterday. They are currently stripping the car so they will cut out the bit of the firewall where the pedalbox attaches. This way I will be able to weld it onto my firewall. Hopefully this will fit and give me the dual circuit brake system I require.
I will take some pictures of the engine and brake setup once it is all in place

Tuesday, September 19, 2006

The Engine is out

This project hasn't seen much action for a while now. I have had problems with my Mercedes 450SL. First I had some issues with the D-Jetronic injection trigger points. Then someone reversed into the car so I had to do some panelbeating and respray. Unfortunately the shop which did the colour matching didn't do a very good job so now the front wing is sligtly off in colour. I might have to repaint the whole car if I don't get a proper match. Does anyone know a good colour matcher in Sydney?

Anyway I had a go at getting the old engine and gearbox out which went fairly well. Some swearing and violence was all that was needed to pursuade it to clear the bodywork on its way out.


The alternative is to remove the front axle, drop the engine down and lift the rest of the car over it. I preferred the old fashioned way of lifting it out eventhough it was a struggle due to the small engine bay compared to the size of the engine.

Next on the agenda is to do a test fit of the 4.2L engine to see if any modifcations have to be done to the fender walls to make room for the Injection Manifold and aircon compressor. Thereafter I will clean and paint the engine bay before the permanent fit of the new engine.

If I have to respray the Merc this will not happen for quite some time.

Tuesday, August 15, 2006

Megasquirt Arrived

I have finally got around to ordering my Megasquirt Engine Management System. I also bought the stimulator so I can play around with the Tuning software before applying it to the engine. I bought both of them assembled as I have realised I will never find the time to assemble them myself. I bought them from Shore Electronics in QLD, Australia. They arrived beautifully assembled and Kendall has been very helpful and even threw in a Air temp sensor for free. I can highly recommend purchasing from them. This is their contact details:
Shore Electronics
1 Link Street
Toowoomba 4350.
QLD Australia
phone 07 46321888
shoreelectronics@westnet.com.au

This is a picture of the partly disassembled 3.8 engine. The pic turned out to be quite artistic (by mistake) in my point of view. I just had a halogen floodlight directed at the engine bay while taking some pics to remember where everything goes once it is time to reassemble. My digital camera couldn't cope with the difference in light hence the nice contrasts in the pic.

Thursday, March 30, 2006

The Jaguar moved in to it's new home

Thursday, March 23, 2006

What to do with the engine?

As it would be too expensive for me to get the engine restored I started to look for alternatives. The first alternative was to put in a Chevy small block V8 as the sound of a V8 is music to me. It didn't feel right though as it would not be a pure Jag anymore. Instead I sourced a 1985 4.2 liter series III engine which was restored 60,000 kms ago. It also came with a BorgWarner 66 automatic gearbox which I plan to use as the original auto is leaking heavily and needs some internal modification done to get tight. The new engine is obviously fuel injected (EFI) but I don't have the ECU or the wiring loom. I have read somewhere that it is possible to fit the SU carbs through using a Jaguar 420 compact manifold. I have decided to keep the fuel injection as I plan to use the car as my daily driver. Instead of sourcing an original (unreliable) ECU I plan to get a after market Engine Management System (EMS) to control both the fuel and the spark. I will have to run a return fuel line back to the tank. I probably also have to install a surge fuel tank to avoid starving the EFI when cornering. The new engine is still from the same family (XK produced from 1948-1986) so the engine mounts should be the same. The Series III's increased cylinder volume and the larger inlet valves together with the EFI should make a nice improvement to the performance. Unfortunately I don't know what the original performance was like as the car wasn't drivable when I bought it so I won't be able to compare. I will just have to compare it to Jaguar's original claim of 8.8 seconds for 0-60 mph for the 3.8 liter Mk 2. I assume that is for a manual car though. If anyone out there have their own real 0-100 km time for a standard 3.8 automatic then please add a comment to this post.

After investigating the prices for the branded EMS systems I have decided to buy the Megasquirt EMS. It is an open source project meaning that anyone can modify the program which control the logic of the EMS. You can even buy the electronic components and solder it yourself. Think of it as the Linux of the EMS world. I plan to buy an assembled unit rather than spending hours with a soldering iron and potentially burning some components.

Now I just have to finish restoring my 1972 Mercedes 450 SL to free up some space in the garage. I will probably not post to this blog again for few weeks...